Author: Daniel Carver

  • Cold Brew at Home: The Complete Beginner Guide

    Cold Brew at Home: The Complete Beginner Guide

    Cold brew has a reputation for being complicated — or for requiring specialized equipment. Neither is true. I’ve been making it at home for three years with equipment that cost nothing extra, and the results are consistently good.

    The Equipment You Actually Need

    A large jar or pitcher, coarsely ground coffee, cold water, and something to filter with (a paper coffee filter, a fine-mesh strainer, or cheesecloth). That’s it. No cold brew tower, no special device.

    The Basic Ratio

    Start with 1:8 coffee to water by weight — 100g coffee to 800ml water. This produces a concentrate that you dilute 1:1 with water or milk when drinking. If you want to drink it straight (not diluted), use 1:12 instead.

    The 1:8 concentrate keeps in the fridge for up to 2 weeks without significant degradation. Make a larger batch and dilute as you drink — it’s efficient and means good coffee is always 30 seconds away.

    The Process

    1. Grind coffee coarsely (rougher than you’d use for French press)
    2. Combine coffee and cold water in a jar, stir to ensure all grounds are wet
    3. Cover and refrigerate for 16–18 hours
    4. Filter: pour through a paper coffee filter set in a fine-mesh strainer over another jar. This takes 5–10 minutes and produces a very clean concentrate.
    5. Store the filtered concentrate in the fridge.

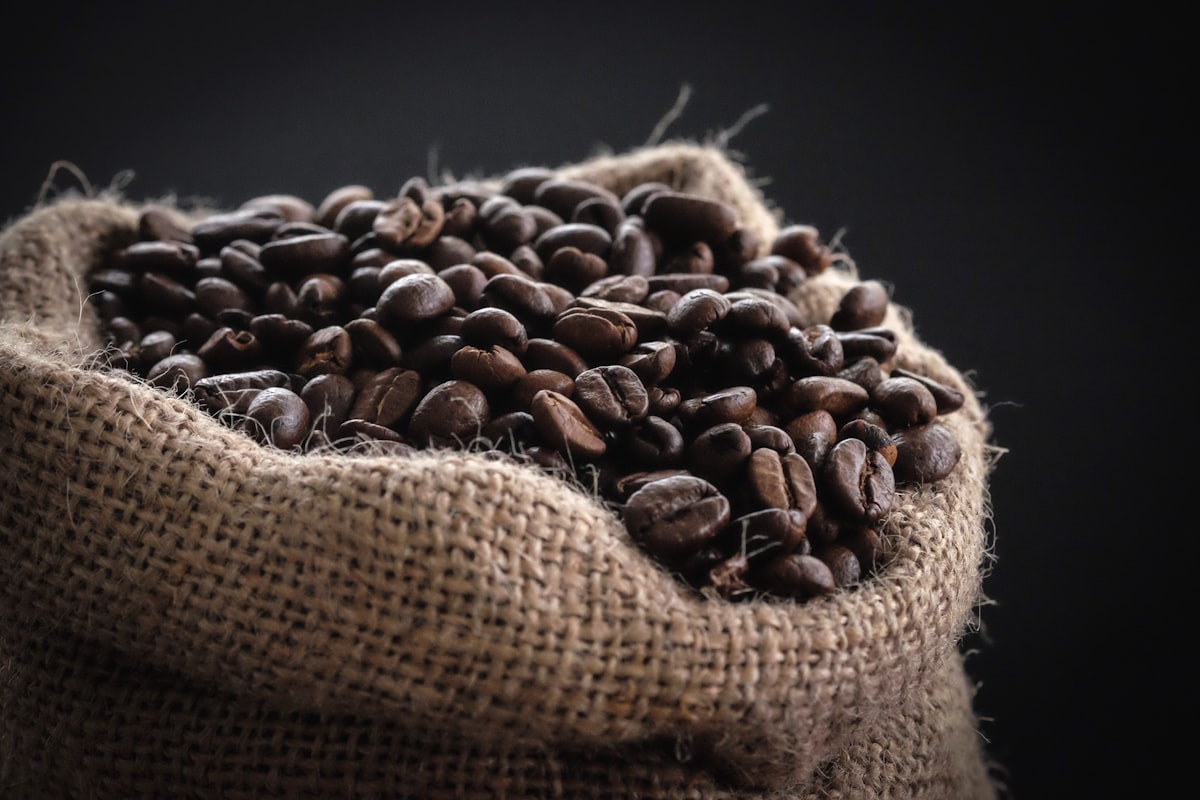
    Which Beans Work Best?

    Medium to dark roasts work particularly well for cold brew because the cold extraction emphasizes sweetness and chocolate notes while minimizing acidity. Light roasts can produce interesting cold brew but may taste more sour and less sweet.

    Research comparing cold brew and hot brew chemistry found that cold brew retains different antioxidant profiles than hot-brewed coffee, which is part of why the flavor is so distinctly different — not just chilled hot coffee.

    Common Mistakes

    Too fine a grind: produces a bitter, over-extracted concentrate that’s hard to filter. Too short a steep: weak and sour. Too warm a room (if you steep on the counter): fermentation can start, producing strange flavors. Stick to the fridge for most reliable results.

  • What Makes Specialty Coffee Different from Regular Coffee?

    What Makes Specialty Coffee Different from Regular Coffee?

    “Specialty coffee” is thrown around freely by coffee brands, but it has a specific technical definition. Here’s what it actually means — and what it means for what’s in your cup.

    The 80-Point Threshold

    The Specialty Coffee Association defines specialty coffee as coffee that scores 80 or above on a 100-point quality scale when evaluated by trained Q Graders (certified coffee quality assessors). Coffee scoring below 80 is considered commodity coffee; 80–84 is specialty; 85+ is outstanding; 90+ is essentially top 1% globally.

    The evaluation covers aroma, flavor, aftertaste, acidity, body, balance, uniformity, cleanliness, and sweetness. Each component is scored independently, and the final number represents a comprehensive quality assessment, not just taste preference.

    The Supply Chain Difference

    Commodity coffee is traded anonymously at market price, often blended from multiple origins and purchased in large batches where origin traceability doesn’t matter. This is most commercial coffee.

    Specialty coffee requires traceability — you know the country, region, often the farm or cooperative, sometimes the specific lot and processing batch. This transparency is both a quality indicator and a pricing mechanism: when you know exactly where coffee came from, quality can be verified and rewarded.

    Why It Tastes Different

    The quality standards filter out defects — damaged beans, over-fermented beans, beans with structural problems — that produce off-flavors. They also select for particular growing conditions (altitude, variety, processing care) that produce more complex, interesting cups.

    Commercial coffee is often designed to taste acceptable across a broad range of roast levels and brewing conditions. Specialty coffee is often designed to taste exceptional when brewed carefully — which is why brewing precision matters more for specialty beans.

    Does the Price Reflect the Quality?

    Sometimes. The specialty label has been diluted by brands that use it as marketing without the quality to back it up. A roaster displaying SCA membership, publishing roast dates, and naming specific farms is a better indicator than the word “specialty” alone on a bag.

  • Coffee and Cortisol: The Science Behind the Best Time for Your First Cup

    Coffee and Cortisol: The Science Behind the Best Time for Your First Cup

    The idea of delaying your morning coffee feels almost offensive to dedicated coffee drinkers. But there’s solid reasoning behind it, and understanding the physiology makes the case more convincing than “a neuroscientist said so.”

    Your Natural Morning Stimulant

    Cortisol is a hormone produced by your adrenal glands that, among other things, promotes alertness and focus. Cortisol levels peak naturally in the 30–60 minutes after waking — this is called the cortisol awakening response (CAR), and it’s a normal part of your circadian rhythm.

    During this peak, you’re already at your most biologically alert. Adding caffeine — which blocks adenosine receptors to create alertness — on top of a natural alertness peak is somewhat redundant, like turning on the lights in a room that’s already bright.

    The Tolerance Argument

    This is where it gets practically important. Research in Neuropsychopharmacology suggests that habitual caffeine consumption during cortisol peaks may accelerate the development of caffeine tolerance — meaning you need more caffeine over time to achieve the same effect.

    By waiting until cortisol has dropped (roughly 90–120 minutes after waking for most people, though this varies), caffeine fills a gap rather than overlapping with your body’s own wakefulness mechanism. The effect may be more pronounced, and tolerance may develop more slowly.

    The Practical Problem

    Ninety minutes is a long time to wait for coffee in the morning. The compromise many people find workable: drink a glass of water immediately after waking, maybe eat something, and then have coffee around the time you’d normally start your work. For early risers, that might mean coffee around 7:30–8am rather than 6am.

    Is the Evidence Strong Enough to Change Habits?

    The research is suggestive but not definitive at a population level — individual variation is significant. If you currently drink coffee immediately upon waking and feel great, there’s no compelling reason to change. But if you notice that you need more and more coffee to feel awake, or that it’s less effective than it used to be, experimenting with delayed timing is low-cost and worth trying for two weeks.

  • Coffee Storage: The Freezer Myth and What Actually Works

    Coffee Storage: The Freezer Myth and What Actually Works

    Coffee storage advice on the internet ranges from accurate to completely wrong, and the wrong advice often comes with a confident tone. Let me sort through it.

    The Refrigerator: Almost Always a Bad Idea

    Don’t store coffee in the refrigerator. The problems: coffee is hygroscopic (absorbs moisture), and opening/closing a cold container in a warmer environment causes condensation. Beyond moisture, coffee absorbs odors from surrounding foods. Your coffee will eventually taste like whatever else is in your fridge.

    Some people store coffee in the fridge for years without noticing any problem. That’s because staled coffee doesn’t taste dramatically bad — it just tastes flat and less interesting. If you’ve never had genuinely fresh coffee as a reference point, you might not notice what you’re missing.

    The Freezer: Actually Viable, With Conditions

    Freezing coffee works if you do it correctly. The key requirements:

    1. Freeze in airtight, single-use portions
    2. Thaw completely before opening (prevents condensation)
    3. Never refreeze beans once thawed

    If you buy large quantities of coffee and want to preserve some for weeks, portioning into zip-lock bags or vacuum-sealed bags and freezing is legitimate. Research in Food Research International has confirmed that proper freezing preserves aromatic compounds effectively.

    Optimal Short-Term Storage

    For coffee you’ll use within two weeks: an opaque, airtight container kept at room temperature, away from heat and direct sunlight. Ceramic or stainless containers are preferable to plastic (which can hold odors).

    A container with a CO2 valve (allowing outgassing without letting oxygen in) is ideal. If your coffee came in a bag with this valve, you can often just reseal that bag effectively for a couple of weeks.

    The Most Impactful Change

    Buy smaller quantities more frequently. Two weeks of coffee at a time, bought fresh from a roaster that prints roast dates, will make more difference than any storage container. Fresh coffee in a mediocre container beats stale coffee in a $50 canister every time.

  • Understanding Coffee Bloom: The Step Most Beginners Skip

    Understanding Coffee Bloom: The Step Most Beginners Skip

    The bloom is probably the most visually satisfying thing in coffee brewing, and also the most commonly skipped step among people who are making pour-over for the first time. Here’s why it matters and how to do it right.

    What Is the Bloom?

    Freshly roasted coffee contains significant amounts of carbon dioxide (CO2) trapped inside the bean structure. When hot water hits the grounds, this CO2 is rapidly released — you see it as bubbling and expansion of the grounds, sometimes quite dramatically.

    The bloom is typically done by pouring a small amount of hot water (about 2x the weight of your coffee, so 30ml for 15g coffee) over the grounds and waiting 30–45 seconds before continuing.

    Why Skipping It Matters

    CO2 is hydrophobic — it repels water. If you pour all your water at once onto fresh coffee, the CO2 creates a barrier that prevents water from evenly saturating the grounds. Water channels through the driest spots while other areas receive too much, resulting in uneven extraction.

    An uneven extraction means some grounds are over-extracted (bitter) and some are under-extracted (sour) — both happening simultaneously. The bloom degasses the coffee before the main pour, allowing water to flow evenly through the grounds.

    How Fresh Is Your Coffee?

    The intensity of the bloom tells you something useful. Vigorous, dramatic bubbling (grounds rising significantly) indicates very fresh coffee — roasted within the last few weeks. A weak or absent bloom suggests the coffee is older and has already off-gassed. The SCA recommends using coffee between 5–30 days post-roast for optimal results in most brewing methods.

    This is one reason why freshly roasted coffee from a local roaster often tastes noticeably better than supermarket coffee — it’s within this optimal window when you buy it, rather than months old.

    Does It Work for Other Methods?

    Yes, though it’s most important for pour-over and drip. AeroPress users can do a quick bloom in the first 30 seconds of brewing. French press benefits less because the extended steep time partially compensates for uneven initial saturation.

  • Manual vs. Electric Coffee Grinders: When to Choose Each

    Manual vs. Electric Coffee Grinders: When to Choose Each

    Three years ago, I switched from an electric burr grinder to a manual one for my morning pour-over. People thought I’d lost my mind. Now I recommend manual grinders to anyone who asks — with some important caveats.

    The Case for Manual Grinders

    At equivalent price points, manual burr grinders typically produce more consistent grinds than electric ones. The reason: without a motor, manufacturers can put more of the budget into higher-quality burrs. A $100 manual grinder often has better burrs than a $150 electric option.

    Manual grinders are also quieter (no motor noise), require no electricity, and are compact enough for travel and camping. The physical experience is either meditative or annoying depending on your temperament and how urgently you need coffee in the morning.

    Popular options include the Comandante C40 (premium, $170–200) and the Timemore C2 (excellent value, $60–80).

    The Case Against Manual Grinders

    Speed and volume. Grinding 20 grams of coffee for a French press takes about 1–2 minutes by hand. Grinding enough for two cups is tiring for most people. If you’re making coffee for multiple people or simply don’t want to invest that time every morning, manual grinding is impractical.

    For espresso specifically — which requires very fine grinds — manual grinding is significantly harder and slower than pour-over. Most manual grinder enthusiasts use them for filtered coffee methods, not espresso.

    Electric Grinders: Better for Volume and Espresso

    If you’re grinding for more than one cup at a time, or if you primarily make espresso, an electric burr grinder is the practical choice. The Baratza Encore ($170) is the most consistently recommended entry-level electric burr grinder. The Breville Smart Grinder Pro ($200) adds stepped grind adjustment that many home espresso users prefer.

    My Verdict

    Solo pour-over drinker who values quality over convenience: manual. Anyone else making coffee for multiple people, doing espresso, or who values a fast morning routine: electric burr grinder in the $100–200 range.

  • Why Your Espresso Tastes Sour (And How to Fix It)

    Why Your Espresso Tastes Sour (And How to Fix It)

    Sour espresso is one of the most common problems home baristas encounter, and it’s almost always caused by under-extraction. The good news: it’s usually fixable with one adjustment.

    What Under-Extraction Feels Like

    Under-extracted espresso is sour, thin, and sharp. There’s a lack of sweetness and body. It might also taste hollow or empty — you get some coffee flavor but it doesn’t linger. This is different from acidic, which can be pleasant in well-extracted espresso; this sourness is imbalanced and unpleasant.

    The Main Cause: Grind Too Coarse

    Espresso extraction happens quickly — typically 25–35 seconds for a standard shot. If your grind is too coarse, water passes through the grounds too fast, extracting the early (sour, acidic) compounds but not enough of the sugars and bitter compounds that balance the shot.

    The fix: grind finer. Make small adjustments (one click at a time on a quality grinder) and pull another shot. Taste the difference. If sourness decreases, you’re on the right track.

    Other Causes to Check

    Water temperature too low: Most machines extract at 90–96°C. If your machine’s thermostat is off or it hasn’t fully heated, the extraction will be sour. Let your machine heat fully — often 15–20 minutes, not just until the light comes on.

    Under-dosing: Too little coffee in the basket means water flows through too quickly even with proper grind size. Make sure you’re dosing the right amount for your basket size (usually 7–9g for single, 14–18g for double).

    Poor distribution: Uneven distribution of grounds in the portafilter creates channels where water takes the path of least resistance. Level and distribute grounds evenly before tamping. The SCA’s espresso standards emphasize even extraction as the foundation of good espresso.

    The Dial-In Process

    Every new bag of beans requires a brief dial-in period, even with the same machine. Grind size, dose, and yield interact — change them systematically, one at a time, and taste between adjustments. This is the actual skill of espresso making, and it gets faster with practice.

  • The AeroPress vs. French Press: Which Should You Buy First?

    The AeroPress vs. French Press: Which Should You Buy First?

    If you’re choosing your first serious brewing device and the choice comes down to AeroPress or French press, here’s the honest comparison — including the real differences people don’t talk about enough.

    French Press: Simple, Reliable, Heavy Body

    French press is the more intuitive of the two. Coarse grounds, hot water, wait, plunge. The metal filter produces a heavy, textured cup with oils and fine particles that paper filters remove. If you like full-bodied coffee, you may love French press immediately.

    The challenges: metal filters let fines through (resulting in sediment), and if you leave brewed coffee in contact with grounds, it over-extracts and turns bitter. You need to pour it all immediately after plunging.

    French press is also harder to clean — grounds get trapped in the plunger assembly. Not a dealbreaker, just worth knowing.

    AeroPress: Versatile, Fast, Forgiving

    The AeroPress brews in 1–2 minutes (faster than almost any other method), is nearly impossible to break, and produces consistent results across a wider range of grind sizes and water temperatures than most devices.

    The learning curve is slightly higher — there are more variables to adjust — but the AeroPress community has documented this extensively. The AeroPress World Championship publishes winning recipes each year, and browsing them is a useful starting point for experimentation.

    The cup is typically cleaner than French press (especially with paper filters) but can be tuned toward more body with the metal filter attachment. It’s more flexible for travel, camping, and office use because it’s lightweight and doesn’t require electricity or a specific kettle.

    My Recommendation

    If you want simplicity and enjoy bold, heavy coffee: French press. If you want versatility, travel-friendliness, and slightly cleaner cups: AeroPress. Both cost under $45 and will outlast more expensive equipment if treated reasonably.

    If you’re genuinely unsure, the AeroPress has fewer failure modes for beginners and produces consistently good coffee from the first use.

  • Coffee Processing Methods: Natural, Washed, and Honey Explained

    Coffee Processing Methods: Natural, Washed, and Honey Explained

    When you see “natural process” or “washed” on a coffee bag, it refers to how the coffee was processed after harvest — specifically, how the fruit was removed from the bean. This single decision has an enormous impact on what ends up in your cup.

    The Washed (or “Wet”) Process

    In washed processing, the coffee cherry’s outer skin and most of the fruit pulp is removed mechanically within hours of harvest. The beans then ferment in water tanks (which helps break down remaining pulp), are washed clean, and dried.

    The result: the flavor in the cup comes almost entirely from the bean itself, not from the fruit. Washed coffees tend to be cleaner, brighter, and more acidic. They showcase terroir and variety most directly. Ethiopian Yirgacheffe washed coffees are the classic example — complex, floral, vivid.

    The Natural (or “Dry”) Process

    Natural processing skips the wet stages entirely. Whole coffee cherries are laid out on drying beds and left to dry in the sun — sometimes for weeks — with the fruit still attached to the bean. As they dry, the sugars from the fruit ferment and infuse into the bean.

    The result: heavier body, lower acidity, and often intensely fruity — blueberry, strawberry jam, tropical fruit. Ethiopian Sidama naturals and Brazilian naturals are good examples. The risk is inconsistency: if drying isn’t managed carefully, fermentation can go wrong and produce unpleasant off-flavors.

    Honey Process: The Middle Ground

    Honey processing (developed in Costa Rica, popular in Central America) removes the skin but leaves varying amounts of the fruit’s mucilage (the sticky layer) on the bean during drying. “Yellow honey” has minimal mucilage; “black honey” has the most, and behaves more like a natural process.

    The cup profile sits between washed and natural: more body than washed, more clarity than natural. The SCA has published extensively on how processing method affects sensory attributes.

    Which to Choose?

    If you want clean, bright, nuanced flavors — seek washed coffees. If you want bold, fruity, complex sweetness — look for naturals. If you want balance — try honey processed. Try the same origin in different processing methods when you can; the contrast is illuminating.

  • Moka Pot Guide: Getting the Best from a Classic

    Moka Pot Guide: Getting the Best from a Classic

    The moka pot has been making stovetop coffee since 1933, and it’s still one of the most efficient ways to make a concentrated, rich cup at home. It’s also frequently misused in ways that produce bitter, harsh results.

    What the Moka Pot Actually Makes

    First, clarification: a moka pot does not make espresso. Espresso requires 9 bars of pressure; the moka pot produces about 1.5 bars. The result is closer to a very concentrated drip coffee than to espresso. It’s strong and rich, but the flavor profile is different.

    That said, moka pot coffee is excellent on its own terms, and treating it as its own drink rather than an espresso substitute leads to better results.

    The Most Common Mistake

    Using boiling water to start. Most instructions say to fill the bottom chamber and put it on heat. The problem is that the water heats from room temperature, and by the time it starts passing through the grounds, the lower chamber water is boiling aggressively. This creates pressure spikes and over-extracts the coffee — hence the bitter result people associate with moka pots.

    The fix: pre-heat your water to near-boiling before adding it to the chamber. Use a kettle, get it to about 80–90°C, fill the bottom chamber, and then put it on medium heat. The coffee brews faster and more evenly.

    Grind and Fill

    Use a medium-fine grind — finer than pour-over, coarser than espresso. Don’t tamp the grounds. Just fill the basket loosely and level it off. Tamping creates too much resistance for the pressure the moka pot generates.

    Fill the basket completely but without pressing down. Fill the water chamber to just below the pressure valve.

    Heat and Remove

    Medium heat. Remove from heat when you hear a gurgling, hissing sound — this means the lower chamber is nearly empty and you’re about to over-extract. Don’t wait until it’s fully finished.

    The Bialetti Moka Express is still the classic, though any well-made stovetop pot follows the same principles.