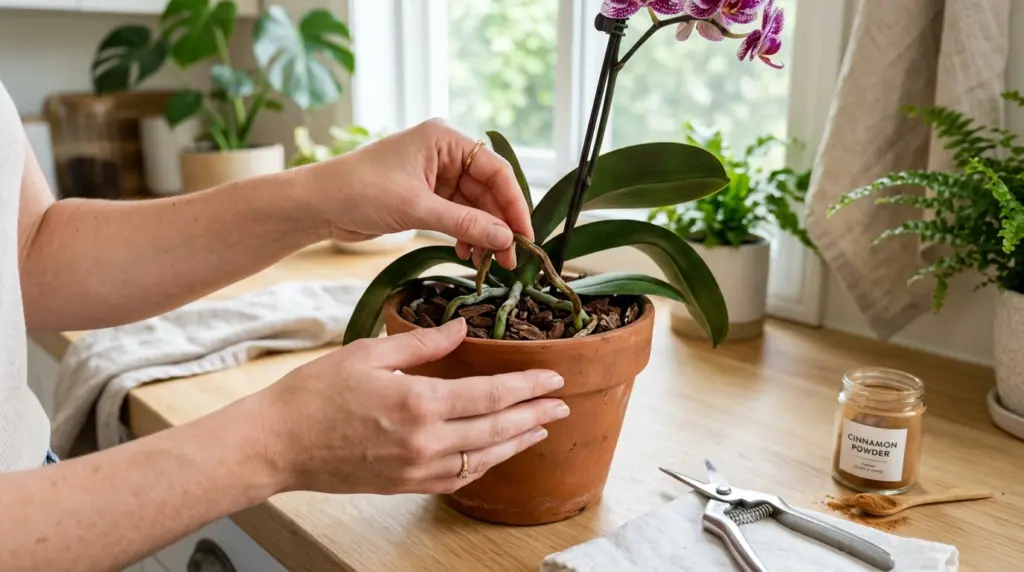
Root rot in orchids: how to identify, treat, and recover the plant.
I realized something was wrong when my Phalaenopsis orchid started gradually losing firmness in its leaves, even with seemingly normal watering. Upon removing the pot to investigate, I found the cause: a large part of the root was brown and soft to the touch, a classic case of rot that required immediate action to try and save the plant.
How do I identify a healthy root compared to a root that is already compromised?
A healthy root is usually firm to the touch, with a greenish color when moist or silvery when dry, unlike a rotten root, which becomes dark brown, soft and, in more advanced cases, easily detaches from the outer layer when lightly pressed between the fingers.
Overwatering is the most common cause of this problem.
As I've already detailed in another article about how to water correctly, root rot usually results from constantly waterlogged substrate, without enough time to dry between waterings, creating a favorable environment for the fungus that causes this type of progressive damage.
A toilet without proper drainage is another contributing factor to the problem.
As I've already detailed in another article about types of pots, a container without sufficient drainage holes retains excess water, even if the watering frequency is correct, so I always confirm that the drainage is adequate before investigating other possible causes.
How do I remove a damaged root during replanting?
Using clean scissors or a knife disinfected with alcohol, cut away all the brown and soft part until you reach firm and healthy tissue, leaving no compromised residue that could continue spreading the problem to the rest of the healthy root.
How do I disinfect the tool between each cut during this procedure?
I wipe the blade with alcohol between each individual cut, even when working on the same plant, reducing the risk of transferring fungus from a compromised part to another still healthy part during the process of removing the rotten root itself.
A completely new substrate is essential after this procedure.
I never reuse old substrate after a root rot has occurred, as it likely carries the fungus or bacteria responsible for the original problem. I always opt for completely new material to reduce the risk of recurrence in the newly treated plant.
A new or well-sterilized vessel is another important consideration in this process.
If I reuse the same pot, I wash it well with water and a little diluted bleach, rinsing it thoroughly afterwards, ensuring that no residue from the previous problem remains in the container before replanting the treated and healthy root.
How do I adjust watering after significantly reducing the plant's root system?
With less root available to absorb water, I temporarily reduce the watering frequency, avoiding overloading the already weakened system while the plant invests energy in developing new roots to replace the part that had to be removed.
I use cinnamon powder as a natural healing agent, which I already use for this type of cut.
I apply a light layer of cinnamon powder to the cut, taking advantage of the spice's natural antifungal properties—an extra precaution I've been using for years that seems to help protect the wound while it heals naturally.
A sign of recovery that I've learned to recognize after this procedure.
I observe the emergence of new root tips, usually greenish, appearing near the base of the plant in the weeks following treatment, an encouraging sign that the plant is recovering and investing energy in rebuilding the lost root system.
How long does it take for a plant to fully recover from this problem?
Depending on the severity of the root loss, full recovery can take several months, requiring patience and consistent care throughout this period, without expecting quick results considering how much the plant needs to rebuild from scratch to reach its previous health.
How do I physically support the plant while the new root system is still insufficient?
I use a discreet support or place the pot near a stable surface, since plants with very small roots can be physically unstable until they develop enough anchorage to support themselves in the new substrate.
I made the mistake of watering normally right after this procedure.
The first time I needed to remove a rotten root, I returned to my normal watering routine too quickly, without considering that the plant had much less absorption capacity, resulting in further partial rot that required a second corrective procedure.
How I adjusted my approach after learning from that mistake.
I started reducing watering for at least a few weeks after any significant root removal procedure, gradually increasing it only as I noticed a clear sign of new root development, avoiding repeating the same mistake of rushing things too much.
Recording each root removal procedure in my grow notebook.
In my grow notebook, already mentioned in another article, I note the date of any significant root removal, how much was removed, and how the plant responded in the following weeks—a record that helps me track its recovery in a more organized way.
Proper ventilation is essential to prevent this problem in the future.
As I've already detailed in another article about ventilation, good air circulation helps the substrate dry more evenly, considerably reducing the risk of rotting even when watering is occasionally a little more generous than ideal.
How can I use the weight of the pot to monitor moisture without having to repot it every time?
I learned to feel the weight of the pot right after watering and compare it to the weight when it's drier, an indirect method that helps me decide when to water again without having to repot the plant every time just to check the condition of the roots.
How do I monitor the plant's recovery over the following months?
I photograph the plant right after the procedure and repeat this every few weeks, keeping these images along with the record in my grow notebook. This visual method helps me objectively confirm that recovery is progressing even when the progress seems slow on a daily basis.
How do I advise another grower who sends me a photo asking for help with this problem?
I always recommend first carefully removing the pot to examine the root closely, since a photograph of the leaf alone rarely reveals the true extent of the problem, and only after this direct inspection can I more confidently advise on what specific procedure is really necessary in that case.
Questions I've been asked about rotten roots
Can an orchid survive after losing almost all of its roots?
Yes, provided some healthy tissue remains and the plant receives proper care during recovery, many orchids can rebuild their root system over a few months of patience and consistent attention.
Do I need to discard the plant if almost the entire root system is compromised?
Not necessarily, since some orchids can recover even from very severe situations, but it's worth considering the effort involved versus the real chance of success before deciding whether or not to continue trying.
Can I use hydrogen peroxide instead of cinnamon powder when cutting?
Some growers use this alternative with reasonable results, but I prefer cinnamon powder for its ease of application and proven natural antifungal properties, without the risk of further irritation to already sensitive, freshly cut tissue.
Dealing with root rot taught me the importance of acting quickly at the first sign of a leaf losing firmness, showing that regularly inspecting the root is just as important as observing any other more visible part of the plant in daily care.